Your Windows desktop is more versatile than you think.
You can utilize a number of tricks and tools to keep things tidy and get things done quicker. Whether it’s snapping your windows, flipping between them, or using virtual desktops, we’ve rounded up some of the most useful ways that you can become more productive in the everyday use of your system.
If you think we’ve missed anything out, be sure to let us know your own suggestions in the comments section below.
How to Organize & Control Your Windows Desktop
1. Snap Windows
The ability to quickly snap your windows to each side of the desktop was introduced in Windows 7. It’s useful for when you need to see two windows side-by-side, perhaps when comparing a file or transferring data between folders.
To do so, left click on the title bar of a window and drag it to the side of the screen. It’ll highlight the area that your window will snap to, then release the click to snap it. You can also do the same thing with your active window by pressing Windows key + Left Arrow/Right Arrow (depending on what side you wish to snap to.)
With Windows 10, this functionality has been greatly improved. To account for the fact that more people have larger monitors, you can now snap to the corners on a 4×4 grid. For example, this means you can have one window snapped on the left, with two windows in two right corners.
The same click and drag method works here, but you can now drag into the corner of the screen as well. Once snapped to a side, you can also use Windows key + Up Arrow/Down Arrow to quickly move the active window into a corner.

Windows 10 also has a feature called Snap Assist. When you snap a window to a side and you’re left with empty screen space, it’ll let you select another window to instantly fill that area. Also, click and drag on the dividing line between windows and anything snapped adjacently will automatically resize.
These features are enabled by default, but you can turn some or all of them off. Press Windows key + I to bring up the Settings window, then go to System > Multi-tasking. Underneath the Snap heading, you’ll see all the features that you can adjust.
2. Peek
Another feature first introduced in Windows 7 is Peek. This allows you to temporarily view the desktop or a specific window. To preview the desktop, hover your cursor to the far right of your taskbar. This will fade all open windows and show your desktop until you move the cursor away. You can also use keyboard shortcuts. On Windows 7, hold Windows key + Spacebar to preview the desktop. On Windows 10, it’s Windows key + , (comma.)
This is disabled on Windows 10 by default, but it’s easy to bring back. Right click an empty space on your taskbar and select Properties. In the Taskbar tab, tick Use Peek to preview the desktop when you move your mouse to the Show desktop button at the end of the taskbar. Then click OK.

Alternatively, you can left click the Peek button in the taskbar to take you to the desktop, instantly minimizing all windows. You can then click the button again to bring the windows back into view. This can also be achieved through Windows key + D.
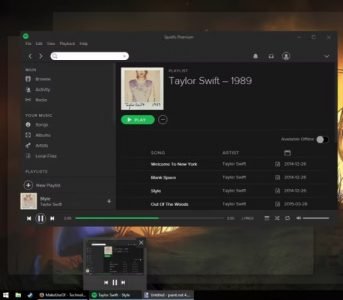
Peek can also draw focus to a particular window, to view its contents without actually switching to it, which is helpful if you’ve got a lot of windows open at various sizes. To do this, hover over a window in the taskbar and then hover over the window preview. This will hide everything else and temporarily bring the hovered window to the forefront. Move your mouse away to defocus or left click the preview to switch to that window.
3. Flip 3D / Task View
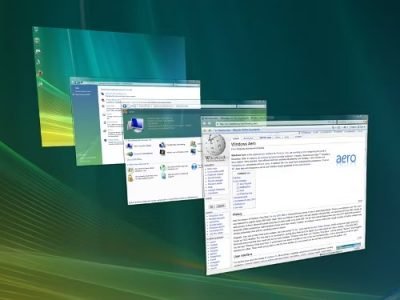
A feature unique to Windows Vista and 7 is Flip 3D. This displays all of your windows stacked and can be accessed by pressing Windows key + TAB. You can click a window to instantly switch to it or scroll your mouse wheel or press TAB to move between them. Although it’s quite cool visually, it’s not really particularly efficient and was dropped in later versions of the operating system.

On Windows 10, pressing Windows key + TAB will now bring you into Task View. Here you will see all of your windows side-by-side, with the ability to left click the preview to switch to that window. You can also click the cross next to each window to close it. It’s here that you can also manage your Virtual Desktops, which we’ll cover in more detail later.
By default, a button for Task View will be placed in your taskbar. To disable or enable this, right click an empty space on the taskbar and click Show Task View button. Note that you’re unable to move the button’s positioning in the taskbar.
4. ALT + TAB
The ALT + TAB shortcut has been a feature since Windows 3.0 – that was over 25 years ago. The functionality of it has essentially remained the same over the years, though it has been tweaked and improved. Simply put, it allows you to quickly switch between the different windows that you have open. To access it, press and hold ALT + TAB, then hit TAB to cycle through your windows. You can release ALT to switch to the highlighted window.
This feature can come in particularly handy when you constantly need to switch back and forth between two windows. You can just tap ALT + TAB to move between them.
There are more shortcuts available in this feature than you might first think. For example, press ALT + SHIFT + TAB to move through your windows in reverse. You can also press ALT + CTRL + TAB to open the window switcher without having to keep the keys held down. To find out more helpful shortcuts and tricks, check out our guide to the ALT + TAB switcher.
5. Virtual Desktops
It’s been a feature of other operating systems for ages, but Windows finally caught up when it included virtual desktops natively in Windows 10. This feature allows you to have multiple desktops virtually – that is, without the physical requirement of having multiple monitors. You can create an unlimited number of virtual desktops and they’re handy for separating your applications. For example, you could have a virtual desktop for your work and another for leisure.
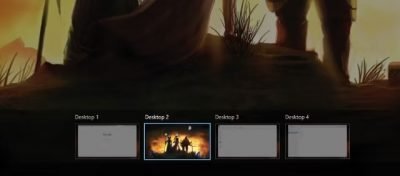
To create virtual desktops, press Windows key + TAB to enter Task View. Then click New desktop. If you hover over a desktop thumbnail then you’ll essentially switch to it. Above, you’ll be able to see previews of all the windows that you have open on that particular desktop, which you can then left click to instantly navigate to. You can also left click and drag these window thumbnails onto a different desktop thumbnail to move it or onto the New desktop button to separate it onto its own desktop.

You can press Windows key + CTRL + Left Arrow/Right Arrow to switch between the desktops, Windows key + CTRL + D to create a new one, and Windows key + CTRL + F4 to close the current one. Sadly, you can’t currently reorganize the desktops or rename them, but since Windows 10 is ever-evolving this feature might come in the future.
If you’re on an earlier version of Windows, or just don’t like the current implementation, you can install a third-party program to get virtual desktops. Two of the best are VirtuaWin and Dexpot. Both of these are free, though the latter only for personal use. VirtuaWin supports all versions of Windows, while Dexpot is available for Windows XP and above. For more suggestions, check out our list of virtual desktop programs.
6. Closing Windows
We all know that we can close a window by clicking the red cross at the top right. That’s Windows 101. Did you also know that you can press CTRL + W to close a tab or ALT + F4 to close any window? You can also press the cross on a window while using Task View and ALT + TAB. But let’s take this one step further for power users.

Do you ever find yourself needing to close masses of windows all at once? Perhaps at the end of a session you just want to get rid of everything or a malicious browser window is causing endless pop-ups. In these situations it would be useful to be able to kill all these processes at once.
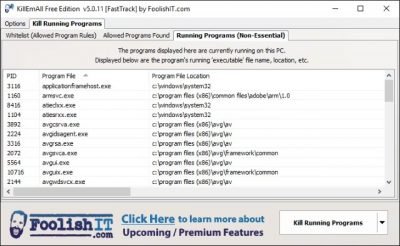
Using a third-party tool like KillEmAll or CloseAll, this is possible. These will forcibly close all your windows at the click of the button, though you can specify if you want some to remain. For ultimate ease of access, pin the utility to your taskbar for one-click process killing.
7. Taskbar Tweaks
As much a part of your desktop as the windows themselves, your taskbar allows you to access your Start menu, programs and notification area. It’s great to use this area to store utilities and shortcuts for things that you need constant access to. For example, you can right-click a shortcut and Pin to taskbar to have the program accessible at all times and then left-click and drag to re-order them.

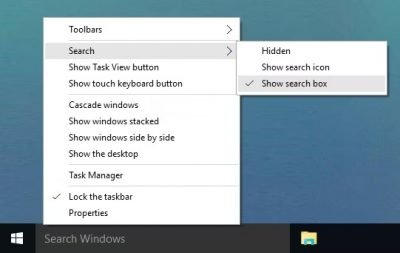
If you’re often wanting to find things on your system, right-click in an empty space on the taskbar, hover over Search and then select either Show search icon or Show search box. If you don’t see the latter option, right-click the taskbar, select Properties, untick Use small taskbar buttons and then click OK.
For further taskbar options, like adding in toolbars or adjusting your notification area, be sure to check out our tips on customizing the taskbar and some more advanced taskbar tweaks.
Onwards with Organizing
These seven steps are all simple to carry out and even if you only use a few of them, you’ll find your experience much improved. Being able to quickly tab between windows or snap them to corners of your desktop will soon become second nature, cutting out the excess clicks and making it easier to carry out your tasks.
For more other IT tips and solutions check out our blog https://chipincorp.com/blog


